Attaching/stretching a skin to a gourd (or bowl) scares off a lot of folks but it's very
simple for even a beginner to do. Cut the skin to the diameter of the gourd rim (PLUS two
or three inches) out of the best looking, thickest part of your hide.
I always sand the rim and outside of the gourd where the sking will eventually lie, so
that this area is roughed up (& if a owl is used, to remove the varnish) and I apply wood
glue in these areas - really does help the skin stay in place.
You CAN follow the skin-stretching method detailed in my full-sized kora article(s) BUT,
It's so simple to mount skin that I now use an easier method:
Soak the skin for a few hours in baby-bath temperature water - no hotter. Then place the
skin on a towel, double the towel over to soak up surface water on both sides.
After years of using carpet-type tacks to build koras etc, I now prefer stout, fairly
large-headed sheet-metal screws. I ALWAYS pre-drill the holes for these screws to avoid any
gourd splitting.
Start mounting the head at a place on the gourd rim that is not near where the neck goes
through.
Center the wet skin across the gourd top. mount two or three screws next to each other,
roughly a half inch apart. Next go to the opposite side of the gourd, and while pulling the
skin as tightly as possible, plot, pre-drill and mount two or three more screws.
Now go 90 degrees around the rim and repeat the above steps - pulling as tightly as possible
on the skin. Then go halfway between the screws already mounted and repeat - all the time
doing the opposite side to what was just done. When the skin dries and tightens, you've got
a perfectly mounted skin head. While the glue is still drying, trim off any excess/unwanted
skin (but leave it as long as is possible). Last step is to place a bunch of big rubber bands
around the "skirt" (outer circumference of the skin) to push the skin against the gourd
while drying. I space screws about a half inch apart, as evenly as possible.
After mounting the skin, and before it is allowed to dry, reconfirm where the six holes for
the handles & cross-brace will pierce the skin & mark with a Sharpie dot. I center all six
holes about an inch from the rim. To make it easier to coax the brace and handles through the
wet, somewhat tightened rawhide, sharpen one end of each to a semi-blunt point. When pushing
through the handles and brace, I cut small circles (about 3/4 their diameter) in the skin -
this helps avoid possibly puncturing the skin. Use care when pushing (or lightly pounding) the
handles & brace through. The handles must ride over the brace -- it is important to push down
(from the top, through the skin) the end of each handle as it is being inserted over the brace
to avoid any tearing. This process ends up bending the brace downwards - for that reason, it
is best to orient the grain in the brace horizontally - less prone for the it break. As a couple
of days go by and the skin continues to dry, keep tightening all the screws.
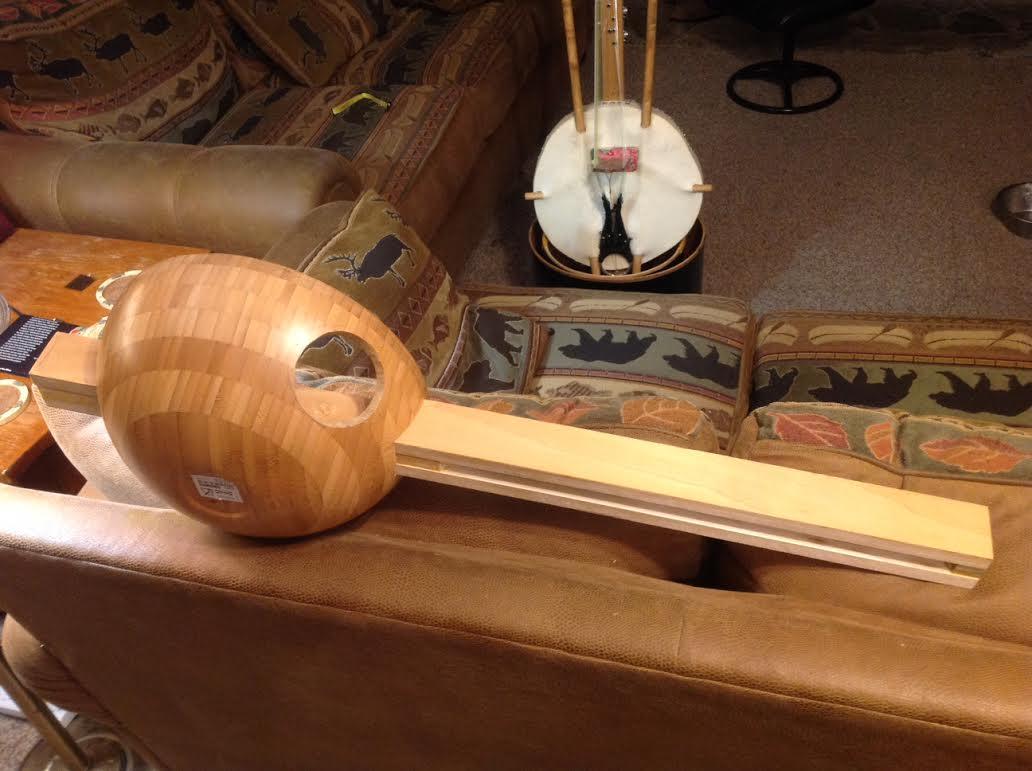
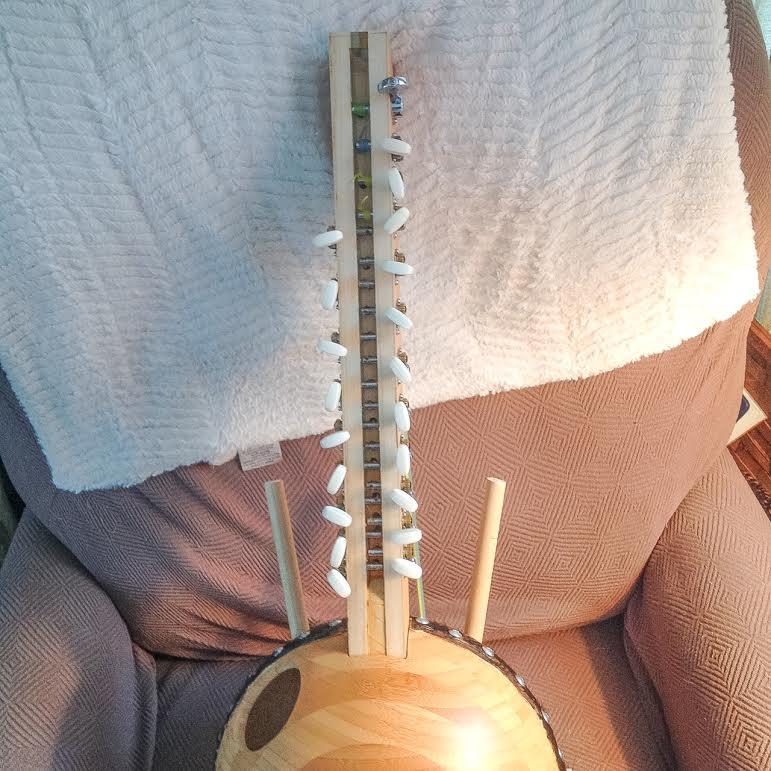
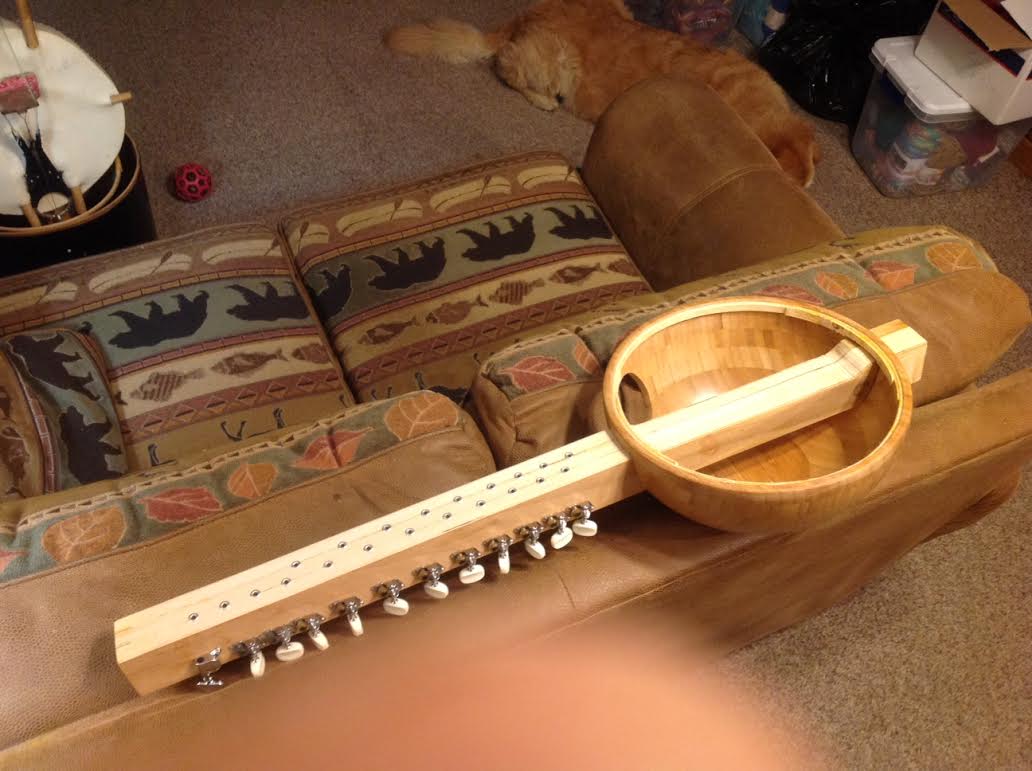
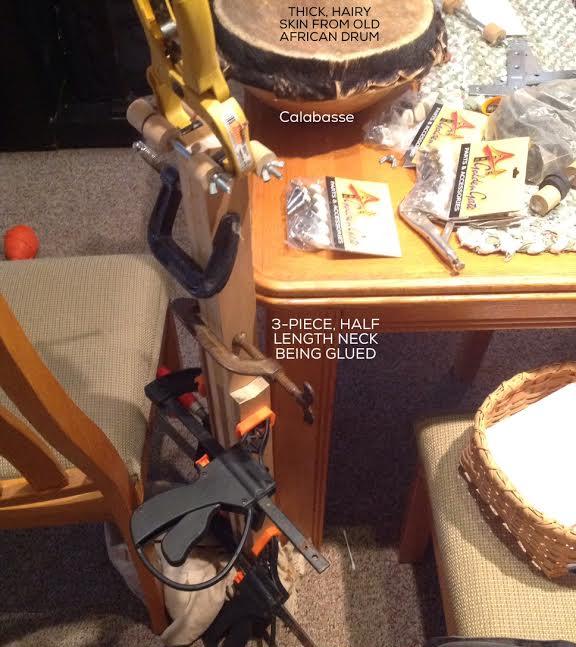
With the skin drying/tightening on the gourd, attention is turned to MAKING THE NECK. Building
the neck is simple & straightforward, requiring only a bit of careful measuring & some
repetitive drilling, glueing/clamping and tuner installing. This neck is made like a sandwich.
Two pieces of bread & a similarily shaped middle piece which is cut away on the bottom only in
the area where the strings wind onto the pegs (the assembled neck in the peg area resembles an
upside-down "U"). The sandwich is glued, clamped and left to set overnight. The "U" faces
downward & the strings exit through holes drilled at an angle in the topside of the "U", above
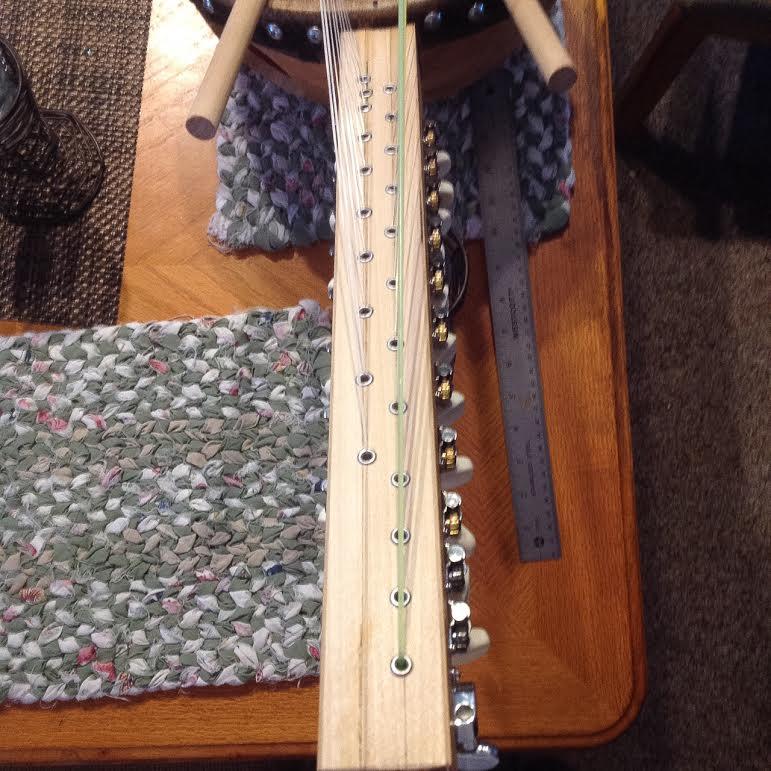
each peg shaft. Into these holes I inserted REWORD guitar tuning machine bushings.
The bushings keep the strings from abraiding and possibly possibly cutting into the wood where
the strings exit the topside of the neck. Bushings really are not even that necessary -
monofilament nylon fish-line riding over hardwood only causes minimal "indentation".
I've used "no bushings" a lot with no trouble. I got my bushings from a "Michael's"
craft store.
BRIDGE & STRINGING:
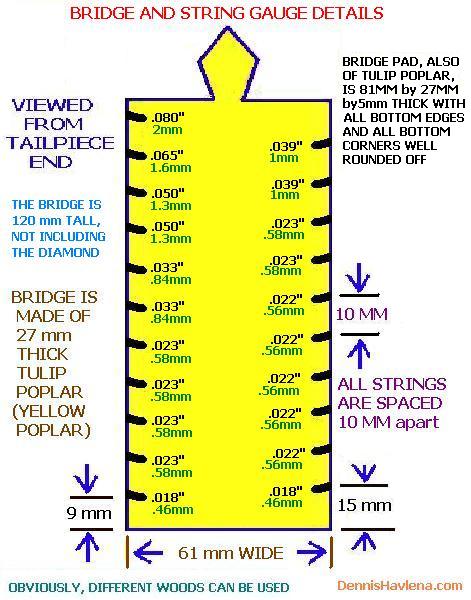
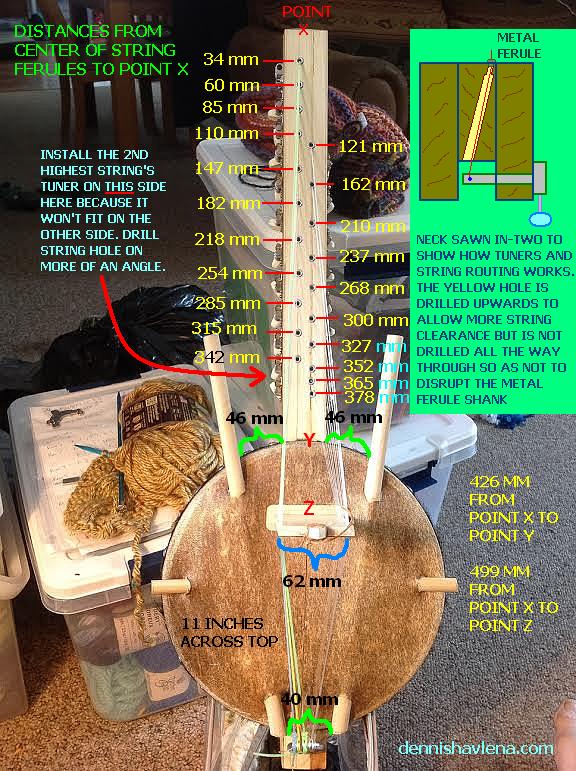
Locate the face of the bridge 499mm from "point X". Because of my fondness for Tulip
Poplar wood (aka Yellow Poplar), this is what my bridge is made of. When cutting the
string slots in the bridge, be sure to angle the cuts a bit downwards towards the
tailpiece end AND also a bit downwards towards the center of the bridge. This lessens
the chance of unwanted string buzz & keeps the string firmly on the bridge.
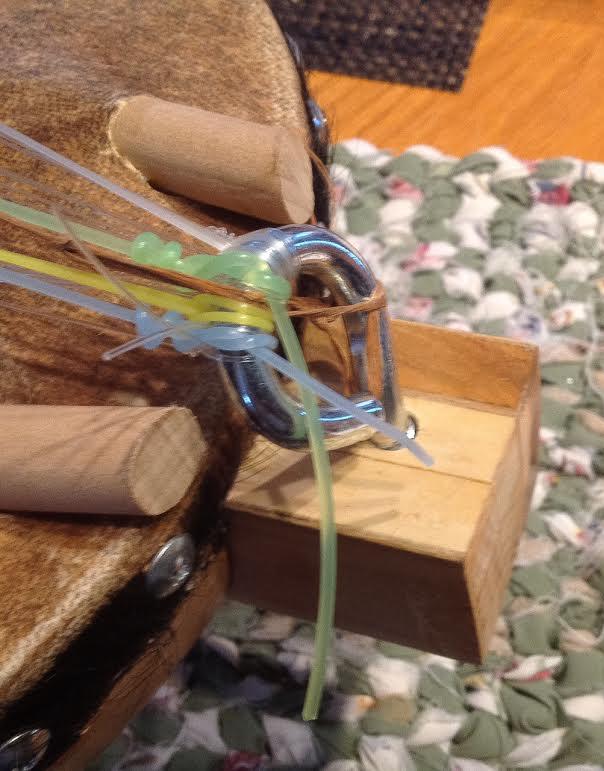
A "guy-wire" or cord is necessary to keep the bridge from tipping over. Wire or nylon cord
works equally wel. Note: with full string tension, the bridge will "sink" considerably.
This is normal & nothing to be worried about (check photos of African Kora photos on the
internet). The guy-wire will then likely have to be re-adjusted to keep the bridge upright
as the instrument is tuned. The amount of the neck sticking past the lower end of the
instrument is not very important. Just make sure you leave enough so that the tie-off
eye-bolt or screw is securely mounted. For this smaller kora I used a hefty screw-in
eye-bolt with it's head hammered into backwards angle towards the bridge..
I used a combination of various gauge monofilament fish-line for the thinner strings and
weed-whip (aka weed-whacker) line for the lower pitched strings. Use ROUND, un-serrated
weed-whip line. Lately grooved, ridged and square line is being sold - avoid it.
NOTE: If anyone absolutely can not find a particular gauge or two, let me know and I'd
be happy to mail to you. String gauges I use are shown (IN THOUSANDTHS OF AN INCH - the
only micrometer I have) in the bridge diagram above.
A NOTE ABOUT STRING STRETCHING: Monofilament nylon line stretches prodigiously at first -
Not just on a Kora, but on any instrument. This is an unavoidable but fortunately fairly
short-lived situation. It takes a couple of weeks or so before the things completely settle
down. Once thus settled, the instrument can go for months without requiring retuning.
It's not only the strings that stretch & settle -- the skin head does so as well.
Also, the bridge settles down into the head & various other wrinkles will likely appear.
This is all very normal and this all settles down in about the same amount of time that it
takes for the strings to settle. My procedure is to tune up the instrument right after
it's made. Then keep retuning it to pitch (not just "to itself") a couple of times daily
(it will drop in pitch regularly). After a day or two it's playable, so long as you realize
that strings will have to be retouched quite often, until it's completely settled. Day by
day the thing holds it's tune better. In aweek's time, you scarcely notice that it's going
out of tune & after another week (or so), it's all settled. There's an up-side to this 2 to
3 weeks of string stretching/numerous retunings -- during the process, you'll invariably
become quite familiar with the string layout, pitch, tuning, intervals etc. By the way,
I have this little kora tuned to somewhere around the key of "D" in the octave above regular
kora tuning. The longest string on the instrument's right side matches the "D" note
immediately above "middle C" on a piano.
MISC. PHOTOS THAT MIGHT BE OF HELP:
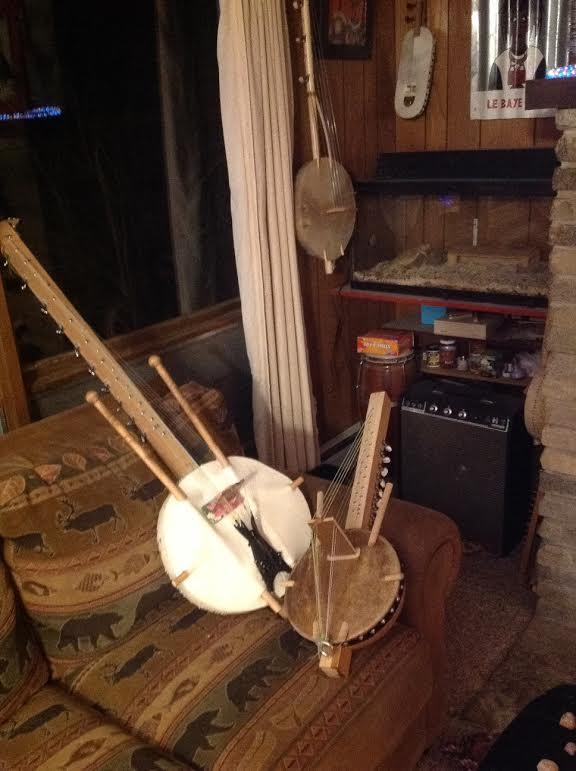
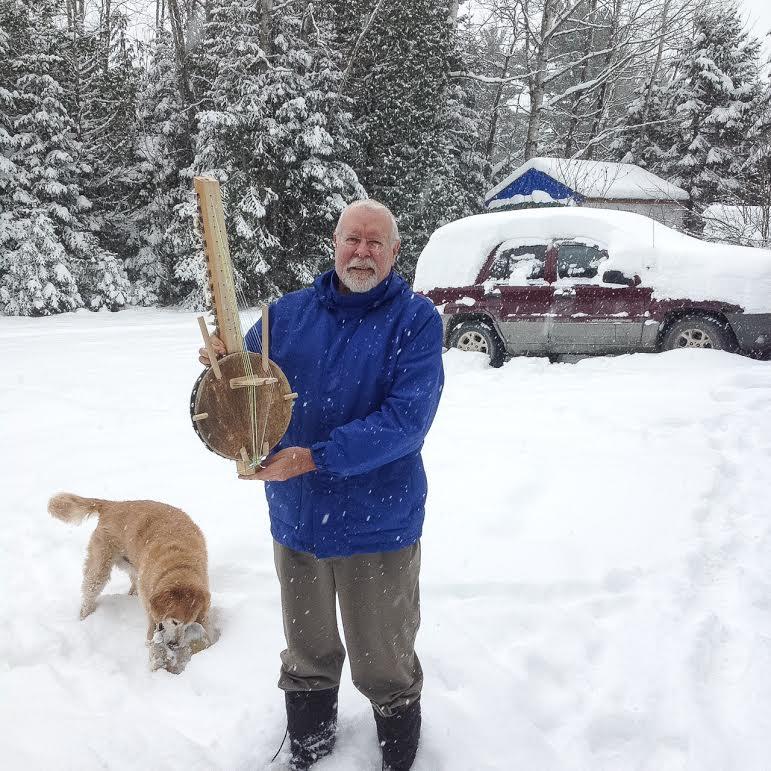
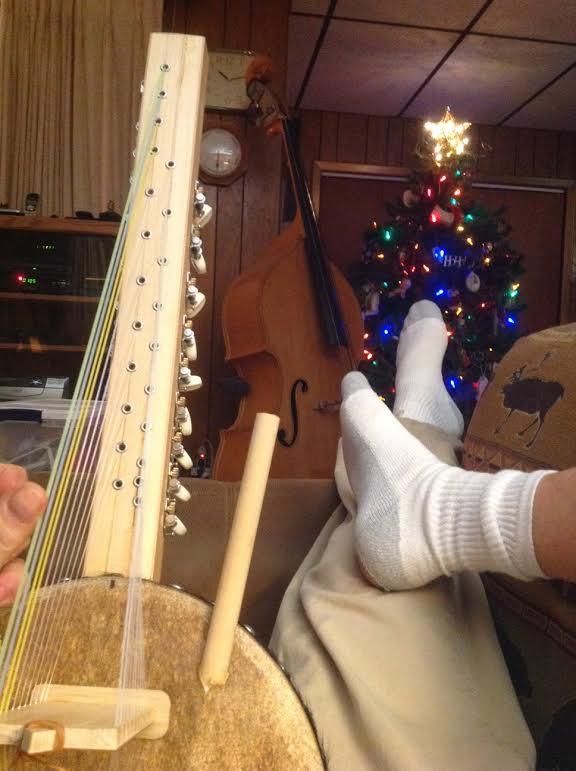
As I get older, I like to play instruments laying back lazily.
Hard to do with a full-size Kora but easy to do with this tiny one!
Commernt, Ideas? Thanks! I'm all alone in the kora wilderness up here.
Dennis Havlena - W8MI
dhavlena@gmail.com
www.DennisHavlena.com
northern Michigan


Keywords: kora n-kora kora-goni goni-pan goni havlena diy build
construct cheboygan dakar