Click here to access
my webpage
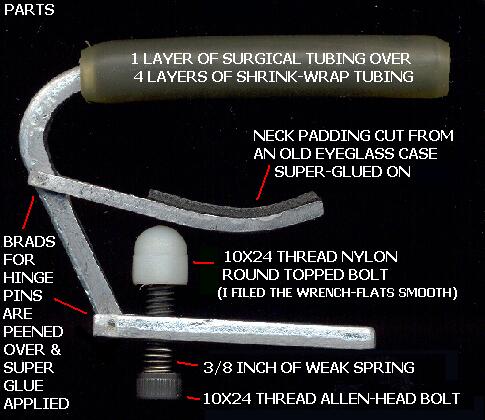
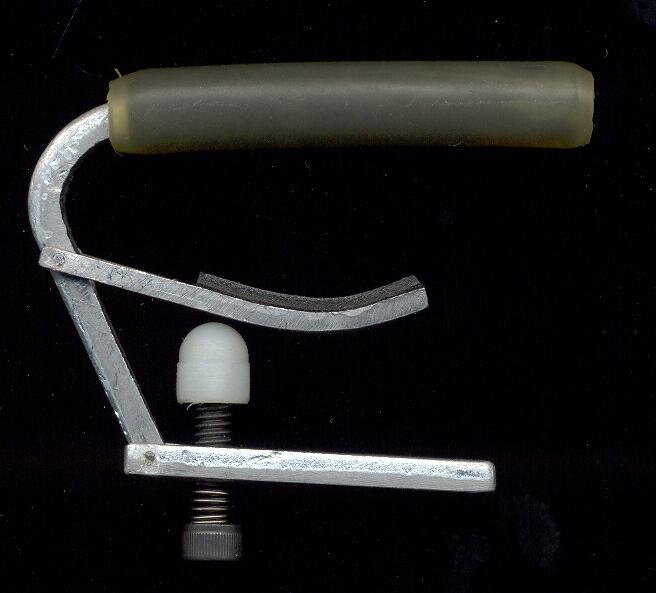
Materials I used:
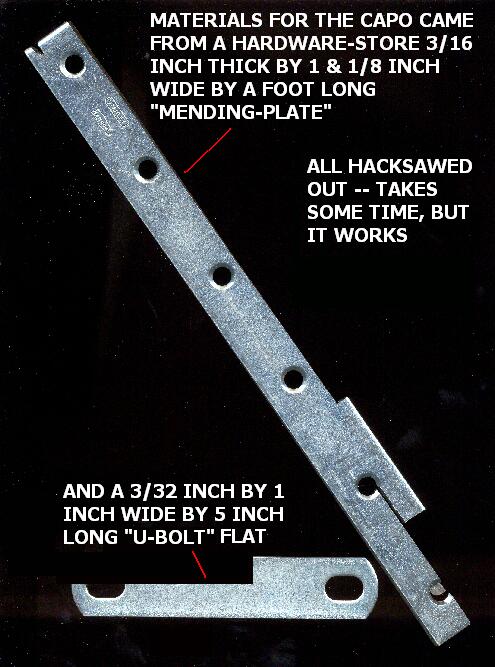
- 1 & 1/8 inch wide by 12 inches long by 3/16 inch thick "mending bracket"
the type sold in hardware stores
- 1 inch wide by 5 inches long by 3/32 inch thick flat U-bolt plate - again
from hardware store
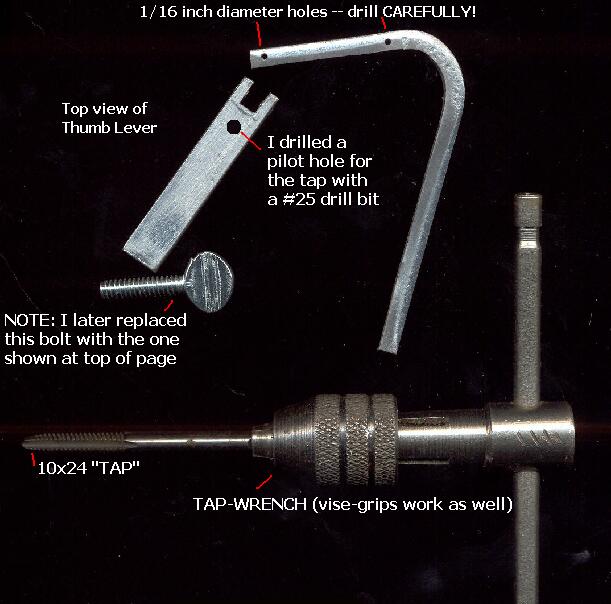
- one 10 x 24 thread black allen-headed bolt - an inch long - hardware store
- one 10 x 24 thread nylon round-topped nut - hardware store
- 3/8 inch of light compression spring - hardware store
- a 10 x 24 thread "tap" to make the thread holes - Home Depot - inexpensive
- a couple of small brads to act as hinge-pins
- few pieces of heat-shring tubing - hardware store
- a few inches of floppy yellow/tan surgical type tubing (3/8"OD x 1/4"ID Latex
Hose is what's stamped on the side of the stuff I got at the hardware store)
- I cut the neck buffer piece from an old eyeglasss case
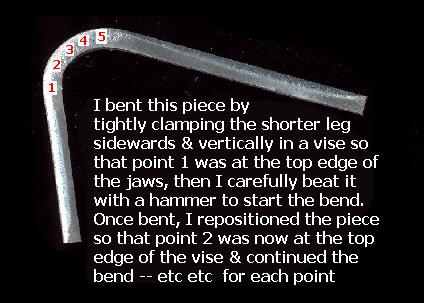
Tools I used: hacksaw, two files, super-glue, vise for bending, vise-grips &
a few other minor odds & ends.
Once the main frame-member is cut from the "mending bracket", work it over with
a file until it's a bit under 3/16" square.
I was surprised to learn that brass is heavier than steel! My contraption
weighs 1/3 ounce less than the commercial jobbie.
Dennis Havlena Webpage at www.DennisHavlena.com