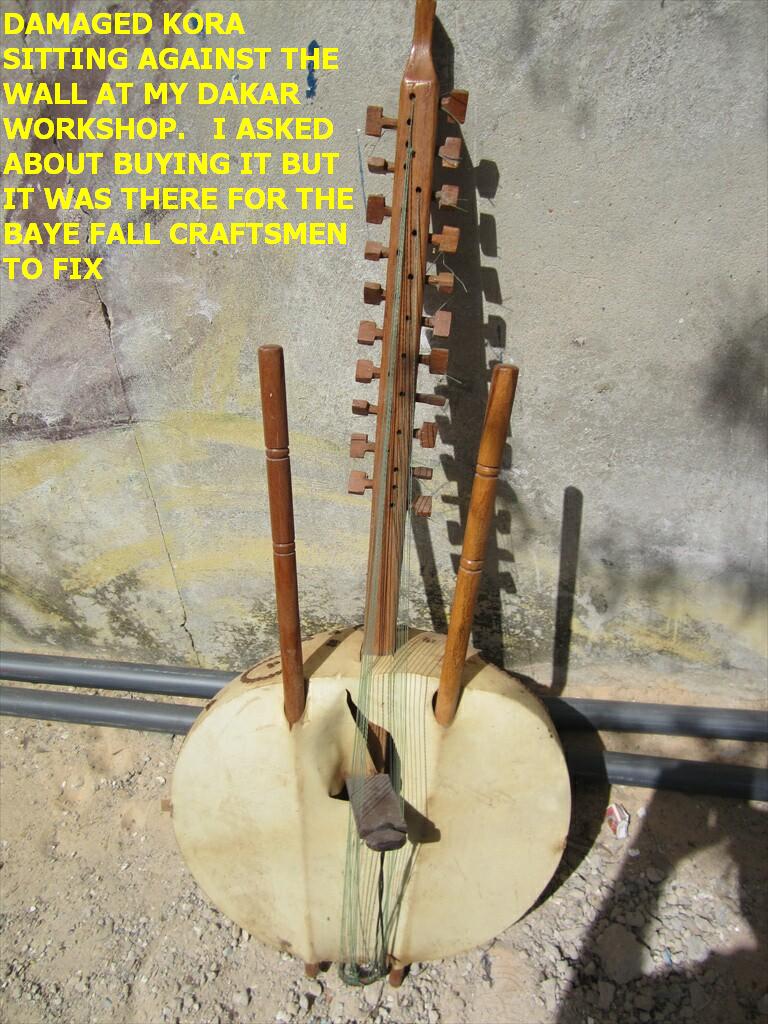
There are a few more photos of this Kora at the bottom of this article.CLICK HERE for a short sound-sample of this Kora
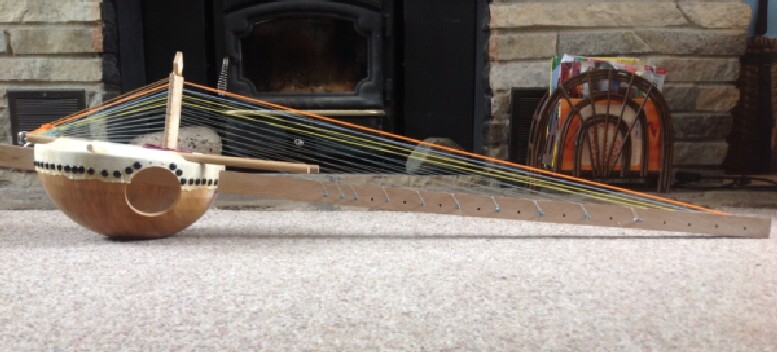
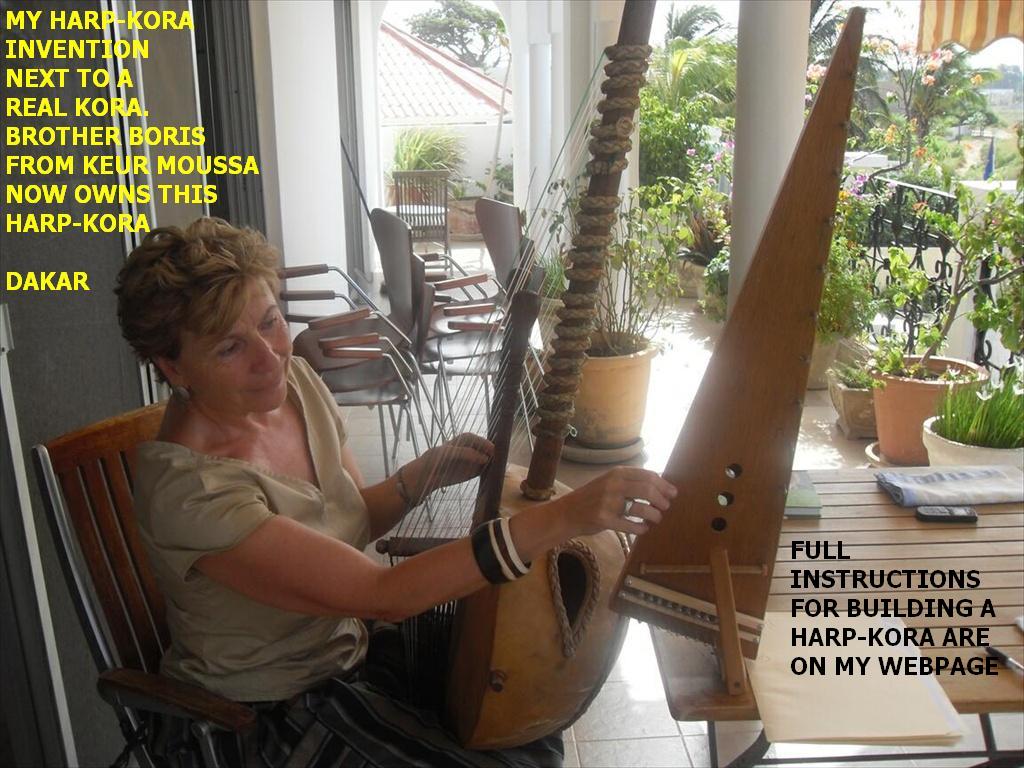
This thing might be considered a "Kora-Lite" what with the simplified
construction, smaller handles, 11 inch diameter "gourd" etc but it has
the same voice, string gauges, string-length, string-spacing &
playability as bigger Koras. I'm finding it's very light weight to make
it perfect for noodling, figuring out tunes and general "grab it &
play it" situations. My Gambian Kora weighs 9.4 pounds. The Kora
described in this article weighs only 3.2 pounds.
A day or two later note:
Elsewhere in this article I mentioned that this Kora might not be as
loud as traditional Koras -- maybe not completely true. I just ran a sound-level
test, comparing this Kora with my Gambian Kora & the results surprised me a bit:
The test: (microphone positioned 2 feet away in all cases)
D string (lowest) on the right side if the instrument:
- My Gambian Kora registered 70 DB
- This lighter Kora also registered 70 DB !
F string (highest) on the right side of the instrument:
_ My Gambian Kora registered 75 DB
- This lighter Kora also registered 75 DB
D string (lowest) on the left side of the instrument:
- My Gambian Kora registered 65 DB
- This lighter Kora registered a bit lower at 60 DB
The four bass strings (lowest on the left side) were the only strings where
the Gambian Kora was a bit louder (mainly just the low D string).
All other 17 strings were the same volume on both Koras.
Skin attachment:
With this smaller than usual head diameter (11"), I did not use the normal
"tie/pull/stretch - bands around the bottom" method. Instead, I soaked the
skin in warm water an hour or so, til soft & pliable, dried off the excess
moisture with a bath towel, then simply tacked it onto the bowl rim about
every 5/8 inch or so - pulling tightly on opposite sides (north then south
- east then west etc) as the tacking proceeded. Even when still wet, the
fully tacked-on head had a nice drum-like resonance & once dried, was
perfectly tight. The bowl material is very hard and quite un-nailable so I
pre-drilled holes for each tack as they went in. Easy. A 1/16" drill-bit
worked fine for my tacks. I advise smearing some Tite-bond wood glue all
around the rim top and a bit down the outsides before tacking on a skin head.
Cheap insurance.
No exact diameter of skin is called for -- if you have a large skin, just
drape it further down the bowl & tack. My skin allowed me a roughly two
inch overhang which is fine.
After tacking, reconfirm where the six holes for the handles & cross-brace
will pierce the skin at the locations described & mark with a Sharpie dot.
When inserting handles & cross-brace through holes in thicker skins, all
I've ever done in the past was to poke a nail-hole thru the skin & simply
enlarge this hole with the stick - the end of which being temporarily
pointed/tapered for this purpose. However, I quickly saw that the somewhat
thinner goat-skin could possibly tear slightly around these holes - this
problem was circumvented by cutting small circles (about half the diameter
of the sticks) out of the skin at the Sharpie dots before proceeding with
the enlargement using the stick's tapered end. Insert the cross-brace
first, then the two handles, which are carefully routed atop the
cross-brace (taking care not to pierce the skin) before resurfacing
at the hole opposite. Make sure the handle rods protrude far enough.
Careful light hammer taps can facilitate this process. In warm and sunny
weather, set the whole mess outside to dry & tighten in the sun - takes
a bit longer to dry inside.
The goat-skin used is not as thick as the hide used on most Koras but I am
positive that it will hold up. I nonetheless glued small circles of hide at
the points where the six dowels protrude from the skin as reenforcement.
The dowels are 1/2" diameter for handles & 3/8" diameter for the cross-brace.
With the skin drying/tightening, attention is turned to
Making the neck.
* (see illustration)
Building the neck is simple & straightforward, requiring only a bit of
careful measuring & some drilling, glueing/clamping and zither-pin installing.
I purposely opted here to build this Kora to use a laminated neck - it being
stronger and less apt to warp. The idea was simply to glue together four
1 & 5/16 inch by 1/4 inch sticks of readily available Oak "utility strips"
sold at Lowes, Home Depot etc for about $12 total. Use a lot of clamps and
scrap wood to ensure a good job. Once dry, plane or sand the four surfaces
flat & smooth - nothing reaal critical.I kinda cheated a bit here and diverged
from my "cheap as possible" intentions by making my neck out if stuff I had on
hand instead of the four Oak strips mentioned above. I had some 1/2" thick
Black Walnut (got for a good price at Habitat for Humanity), so I made a
sandwich: 1/4" x 1&5/16" x 48" Oak "trim" strips glued & clamped on either
side of the 1/2" x 1&5/16" x 48" piece of Walnut. Looks nice - but the
Black Walnut is certainly not necessary.
In the name of "inexpensiveness" (?) I used simple "zither Pins" to tune the
strings. At first I had my doubts that they could hold the tension of the
thicker strings, but I should not have worried. Zero inclination to slip.
I should caution that not all hardwood holds zither pins securely - I'd
stick with hard hardwoods such as rock maple or oak. After plotting the
pin locations as per the illustration, what I did (to ensure tightness)
is to ignore the recommended pilot-hole gauge --- You're supposed to use
a #13 number drill for zither pins but I used a #16 for the thickest string,
a #15 for the next thickest string and a #14 for all the other 19 strings.
This worked out great. Number drills can be found for sale online.
Nineteen of the Kora's nylon strings fit through the holes in the zither
pins nicely as-is but the the holes in the pins for the two thickest strings
have to be drilled-out a bit larger to have the strings fit. Easy.
Carefully plot the location of the two rectangular holes in the "gourd"
through which the neck passes and cut them as close-fitting as possible.
I used a hacksaw blade (minus frame), a few files and a dremel tool.
Again, it's not that fussy - if you goof up and make the hole too big,
the downward string tension of the completed instrument will compensate
and keep everything tight.
* (see illustration)
I did not use the traditional Kora method of tieing off the strings - instead
I used a much simpler method -- tieing the strings directly to a
hardware-store eye-bolt mounted vertically through the end of the neck
(see illustration). This works fine IF you install the strings in the order
shortest to longest. The string attachment loops will then lie nice and
neatly on the eye of the bolt.
* (see illustration)
A fisherman's double cinch/clinch knot is perfect for this purpose and very
quick & easy to make.
* (see illustration)
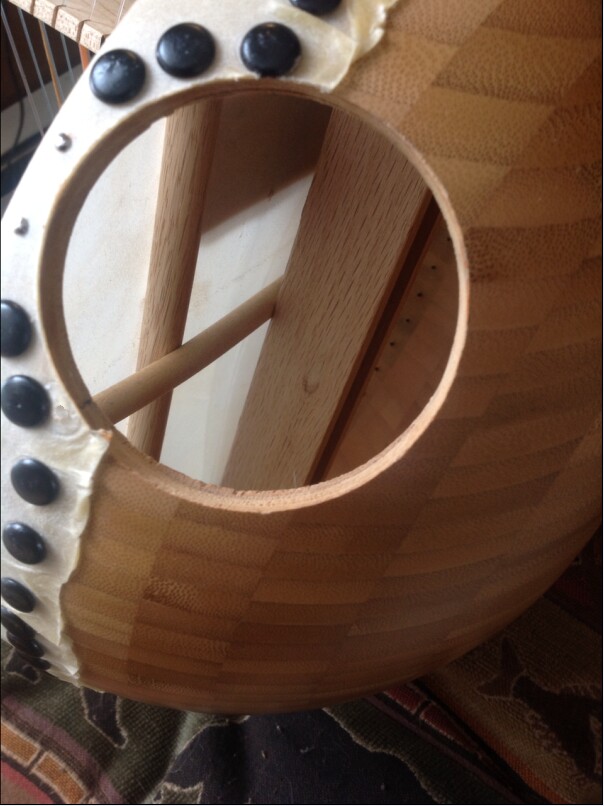
The sound hole I cut is larger than needed, but I had this diameter hole
saw & figured a bigger hole'd let out more sound. Pretty much any sized hole
within reason will work.
* (see illustration)
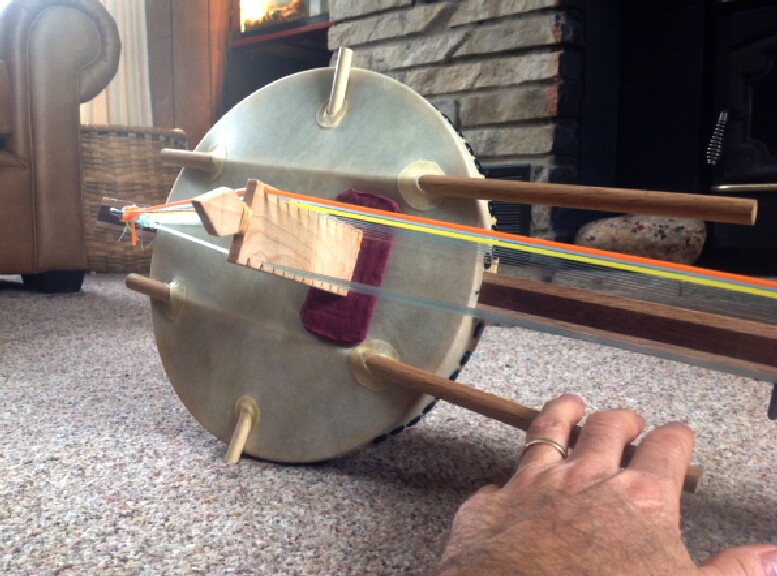
Here are details for making the bridge:
I sometimes use small holes in the bridge for the strings to pass through
instead of slots - but slots are easier when stringing. Angle the slots
slightly downwards towards the center of the bridge to keep the strings
in place.
The neck need not be affixed into the two gourd holes, as the string
pressure will hold everything in place - having said that, I sometimes
glue the neck into the gourd holes - keeps things a bit simpler
during construction.
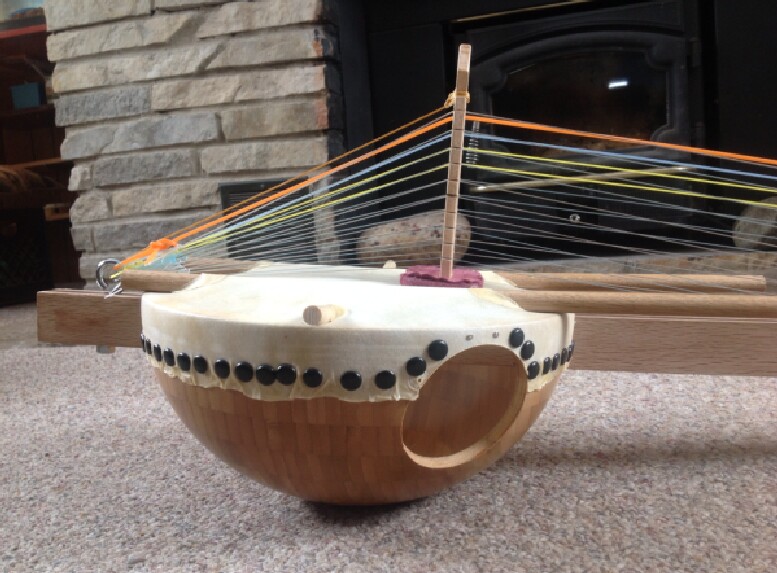
A "guy-wire" or cord is necessary to keep the bridge vertical and keep it
from tipping over. Wire or nylon cord works equally well. The photos show
this guy-wire.
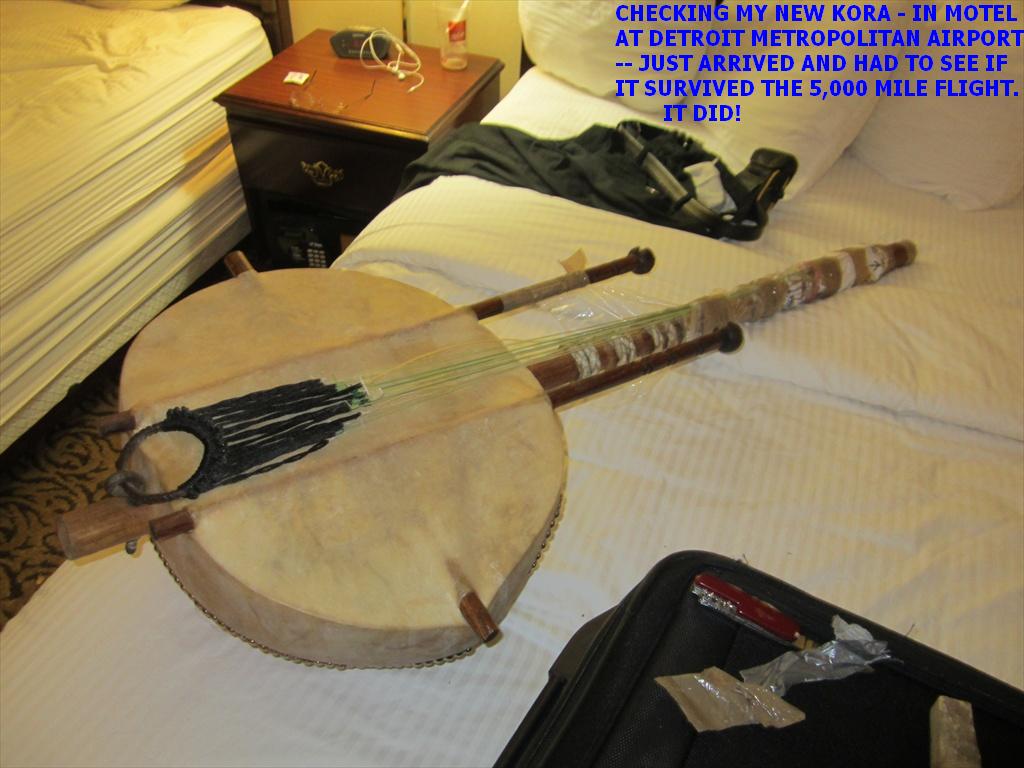
Note: with full string tension, it is very normal for the bridge to "sink"
into the skin-head considerably. This is normal & nothing to be worried
about (check photos of any African Kora on the internet to verify this).
The guy-wire may have to be readjusted to keep the bridge upright.
The amount of the neck sticking past the lower end of the instrument is
not very important. Just make sure you leave enough so that the tie-off
eye-bolt is securely mounted.
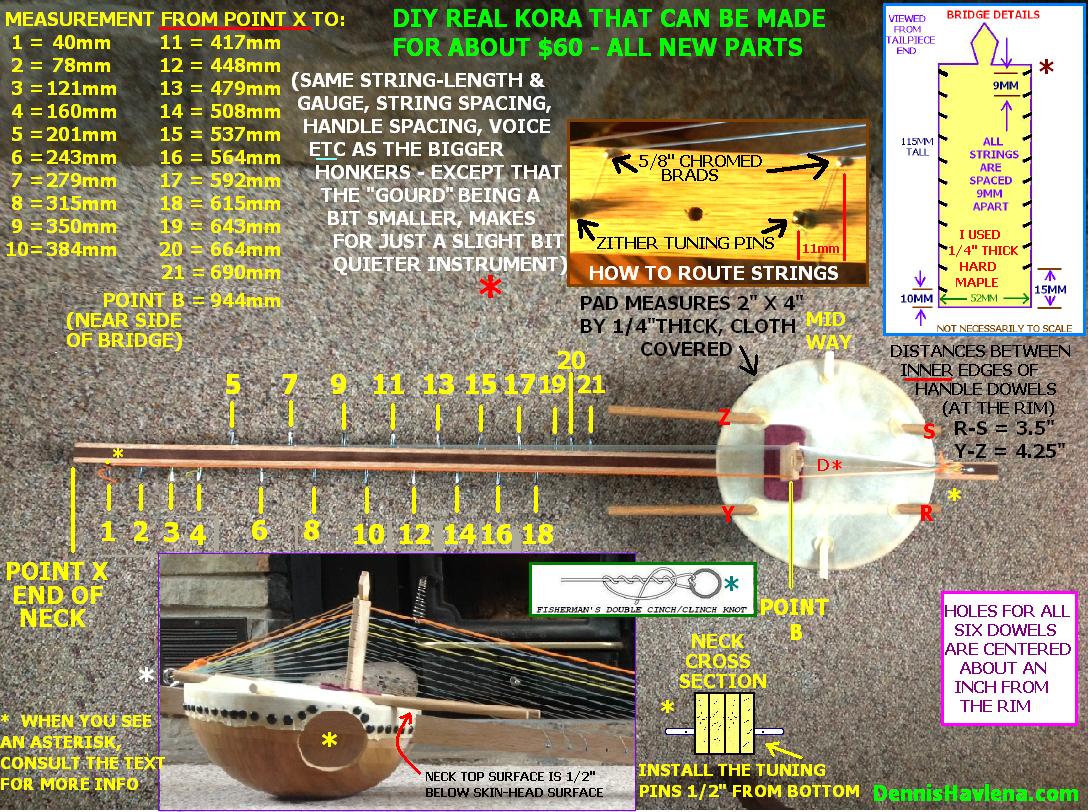
Once the strings are on, locate the left side of the bridge face 944MM
from "point X" (944mm string-length).
String information:
In west Africa, there is really no "standard" pitch that Koras are
tuned to. Some of the ones I make are tuned to an "F" pitch (lowest
strings on the left and right side tuned to "F") but I rather like
this one tuned in the fairly common pitch of "D" - with the lowest
strings on the left and right side tuned to "D".
STRING GAUGES AND TUNING:
HIGH-PITCHED END
30 LB (.022 inch) fishing line C#-| |
30 LB (.022 inch) fishing line A--| |--F# 20 LB (.018 inch) fishing line
50 LB (.029 inch) fishing line F#-| |--E 25 LB (.020 inch) fishing line
50 LB (.029 inch) fishing line D--| |--D 25 LB (.020 inch) fishing line
60 LB (.031 inch) fishing line B--| |--B 40 LB (.024 inch) fishing line
60 LB (.031 inch) fishing line G--| |--G 50 LB (.029 inch) fishing line
60 LB (.031 inch) fishing line E--| |--E 50 LB (.029 inch) fishing line
.050 inch weed-whip line C#-| |--C# 60 LB (.031 inch) fishing line
.050 inch weed-whip line B--| |--A 60 LB (.031 inch) fishing line
.065 inch weed-whip line A--| |--F# 60 LB (.031 inch) fishing line
.095 inch weed-whip line D--| |--D .040 inch weed-whip line (or
100 LB fishing line)
LOW-PITCHED END
Regular monofilament fishing line is used for the higher-pitched strings.
Weed-whip (aka weed-whacker) line is used for the lower pitched strings.
Use ROUND, un-serrated weed-whip line. Lately ridged or square line
is being sold - avoid it.
NOTE: IF ANYONE ABSOLUTELY CANNOT FIND A PARTICULAR GAUGE OR TWO,
LET ME KNOW AND I'D BE HAPPY TO MAIL TO YOU.
Re Fish-line:
"Strengths" (in pounds) of fish-line needed are;
20 LB, 25 LB, 30 LB, 40 LB, 50 LB, 60 LB & 80 LB.
This line is available in a wide variety of
strengths (rated in pounds). Wall-Mart & K-mart
carry many gauges. Cabela's big Sporting Goods
catalog carries all of the required gauges, but
I have found that their huge retail stores do not
always carry all the gauges that their catalog does.
Dunhams and other such sporting goods stores often
have what K/Wal Mart doesn't. It just takes a bit
of looking around. You can always go the Cabelas
mailorder route.
Re Weed-whip line:
Diameters of the weed-whip line needed are:.040",
.050",.065" and.095" K-mart and Wal-mart do (at
least sesonally) carry most of the gauges of
weed-whip line needed. Also, Tru-Value & Ace carry
a wide selection of this line. Try lawn-mower
specialty shops. One caution however is to avoid
buying grooved or square line. While these MAY work,
go for the regular round monofilament line. In the
winter, I have been able to have the people at our
local Tru-Value hardware store go into the basement
to get rolls of this stuff for me. If you simply
cannot find a particular gauge weed-whip or fish-line,
just use the next smaller size & get used to the
slight "looseness" & very slightly lower volume.
If you really can't find the wanted string gauge,
let me know and I can send to you.
A NOTE ABOUT STRING STRETCHING:
Monofilament nylon line stretches prodigiously at first - Not just
on a Kora, but on any instrument.This is an unavoidable but
fortunately short-lived situation. It takes about two weeks or so
before the things completely settle down. Once thus settled, the
instrument can go for months without requiring retuning.
It's not only the strings that stretch & settle -- the drum head
does so as well. Also, the bridge settles down into the head &
various other wrinkles will likely appear. This is all very normal
and this all settles down in about the same amount of time that
it takes for the strings to settle.
My procedure is to tune up the instrument right after it's made.
Then keep retuning it a couple of times daily (it will drop in
pitch regularly). After a day or two it's playable, so long as
you realize that strings will have to be retouched quite often,
until it's completely settled (in a couple of weeks).
Pulling on the strings after they're just put on can speed the
stretch-in process.
During this process, remember to not just tune the instrument
to itself, but tune it up to pitch. Day by day the thing will
hold it's tune better.
A tip - when using zither pins, try your best not to ever crank
a pin into the wood so far that the non-threaded part of the pin
enters the neck hole lest the threads in the wood get messed up.
It's a great idea to periodically (for the first couple of weeks)
take off the strings one by one (keeping full tension on all the
other strings) & back the pin out until about 3/16" of thread is
showing, insert the string back in the hole in the pin & then pull
the string 3/4 of an inch or so further thru the pin hole before
re-tightening. This trick is most useful on the four thickest strings,
which seem to stretch more than the higher pitched strings.
Click here to access
my webpage
Check ny other Kora articles, some of which have a few tips for playing.
Despite being involved with Koras for decades, I am a novice when it
comes to playing the instrument. Too many musical irons in the fire I
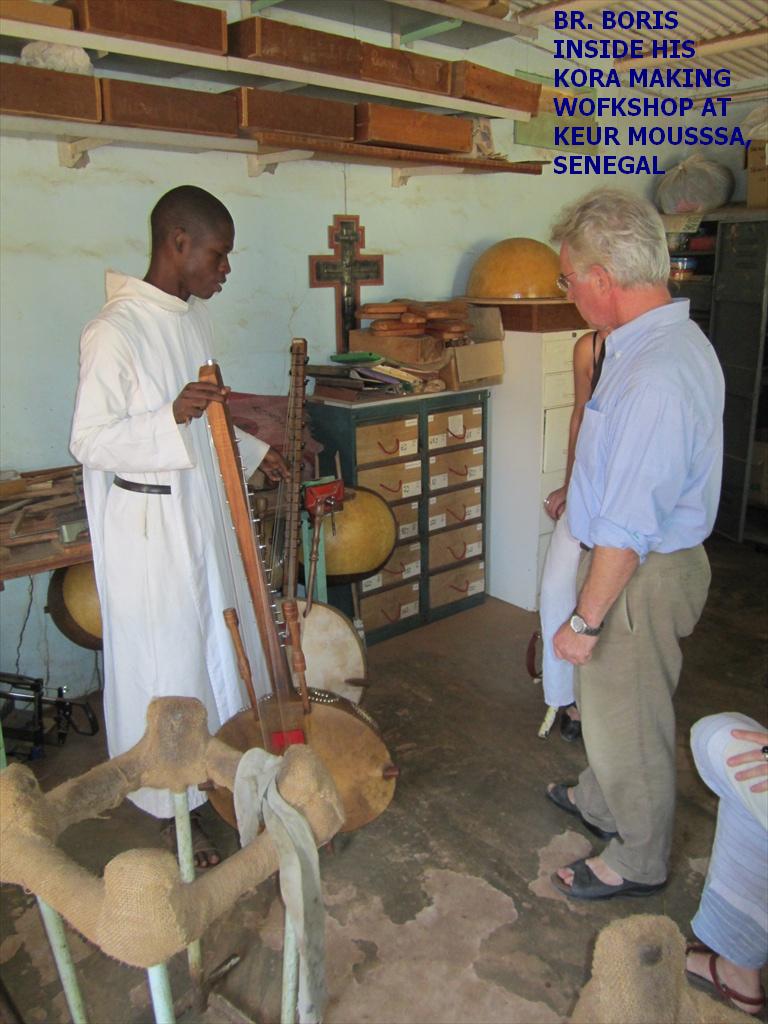
guess. Several weeks in Senegal not long ago greatly rekindled my
interest & despite my advanced age (66), I've been earnestly trying to
learn more --- am making progress. Perhaps before too much longer I can
get brave enough to put a short sound sample of this Kora on youtube. Ha.


Let me know if you have any questions or build this thing.
It's a lot of fun to build and to play.
Dennis Havlena - W8MI
Straits of Mackinac,
northern Michigan
dhavlena@gmail.com
http://www.DennisHavlena.com
keywords: diy kora do it yourself homemade home made build construct havlena
how to african elk hide calabasse callabash gourd dennis dennishavlena dhavlena
gmail com dakar keur moussa senegal africa goethe institut eccif baay fall baye fall
inexpensively inexpensive cheap zither pins monofilament